Software environment setup
For this course you need:
the OpenModelica environment
Git
These are already installed in the classroom, but if you want to have them on your personal computer, you are welcome to do so. These notes are meant to help you.
Once OpenModelica is installed, you can head to Getting started with OpenModelica (FR).
Installing OpenModelica
If you want to use OpenModelica on your own computer, you are welcome to do so. I only ask one thing: do the installation process ahead of class, because it takes at least several minutes (1 GB of download + installation time).
Remark of MacOS users: the people behind OpenModelica development haven’t had enough time ressources to maintain a proper MacOS version since 2020. Alternatives are:
Running the Windows version with an emulator (https://www.parallels.com/fr/products/desktop/ tested successfully in 2021)
Use a virtual machine: https://openmodelica.org/download/virtual-machine
Instructions: (for Windows)
On OpenModelica homepage https://openmodelica.org/, navigate to the Download page for Windows.
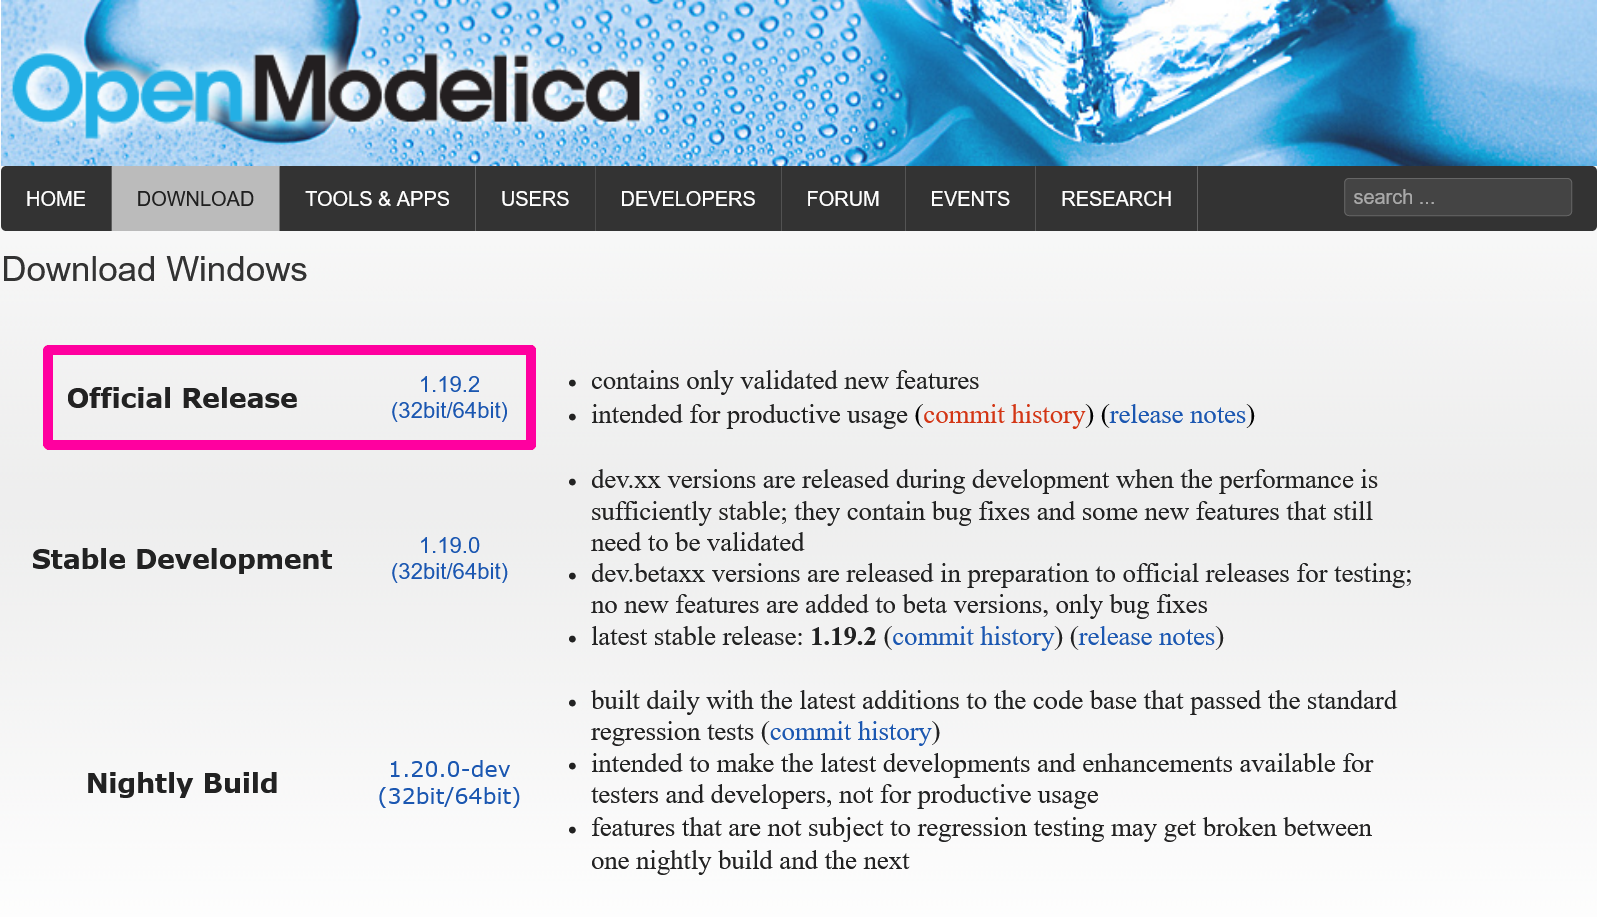
Fig. 1 OpenModelica download page for Windows (as of Autumn 2022)
On the Windows Download page, select the link of the Official Release version
(1.24.2 as of Autumn 2024) as on Fig. 1.
Opening this link will then make you navigate in a sequence of folders:
Choose the
64bitfolder (unless you have a compelling reason to choose the 32 bit version)In the
64bitfolder, download the “large” binary fileOpenModelica-vx.y.z-64bit.exe(a file which size is about 1.8 GB), wherex.y.zis the version (1.24.2as of Autumn 2024)
Then wait for the 1.8 GB installer file to download.
Run the installation wizard (takes somes minutes…).
Now see next sections for launching and setting up OpenModelica.
Launching OpenModelica
OpenModelica can be launched from Windows’ Start menu. In fact OpenModelica is composed of many tools and the one we’ll use is the graphical environment OpenModelica Connection Editor (or short “OMEdit”). You should find it in the search box (see Fig. 2).
Then, I recommend to pin it to the Start menu or the task bar, or add a shortcut to the Desktop.
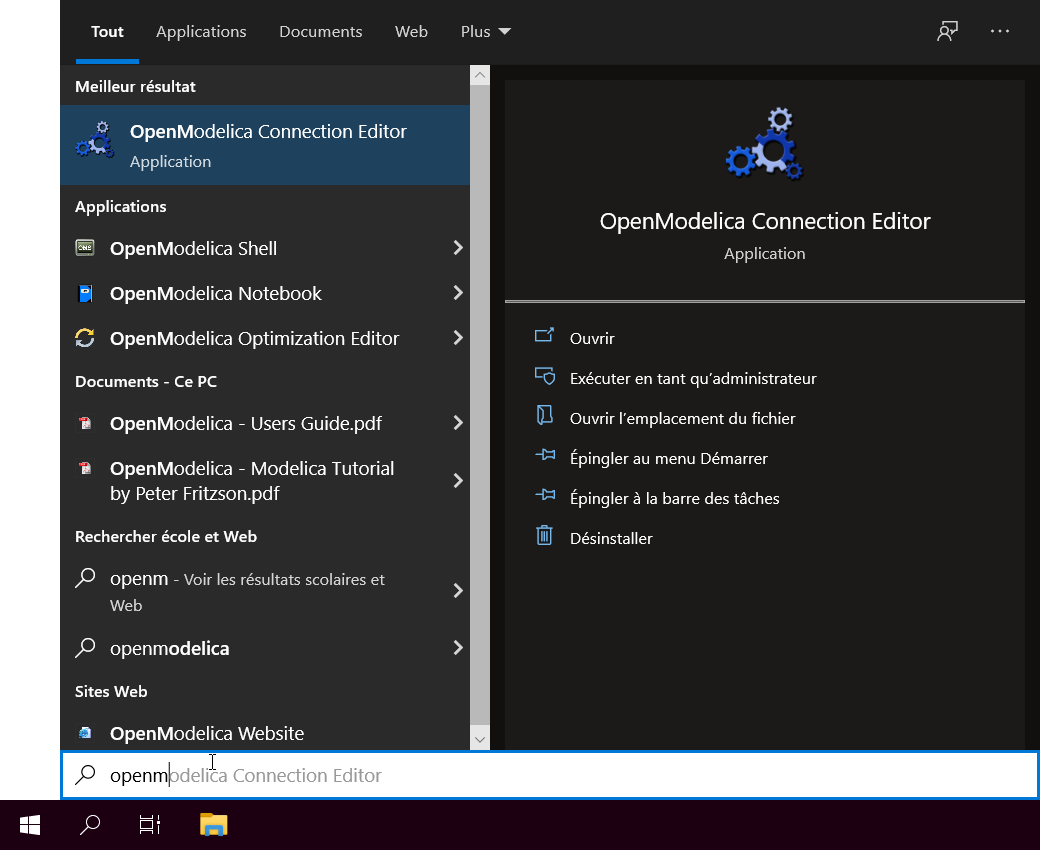
Fig. 2 Launching OMEdit from Windows’ Start menu using the text searchbox
Setting up OpenModelica
Once OMedit is launched, you should see, in the Libraries browser panel,
the Modelica package which stands for the Modelica Standard Library (MSL)
(see Fig. 3).
More specifically, in the tooltip which pops up when the mouse cursor hovers the package,
you should see the version number 4.0.0.
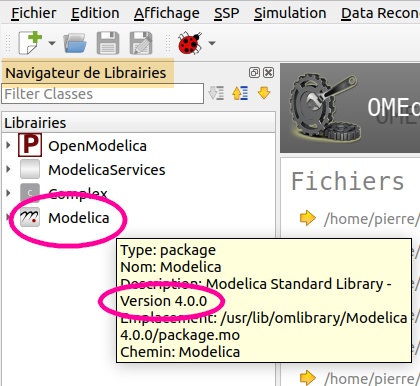
Fig. 3 Library browser panel in OMEdit, which list include the Modelica package
If not (that is either you don’t see the Modelica package or it’s a version older than 4.0.0), then you need to configure the loading of the Modelica library at startup:
Open the Options dialog of OMEdit (from “Tools/Options” menu)
Select Libraries panel
Add Modelica to the list of libraries automatically loaded at startup (or edit the entry if it’s an older library version). You may need to enlarge the Options window to see Add/Edit/Remove buttons…
Once OpenModelica is installed, you can head to Getting started with OpenModelica (FR).
Git and Gitlab
For Git, see the Git installation sheet (print).
See also Version Control with Git.
The school hosts a Gitlab instance for course projects at https://gitlab-student.centralesupelec.fr/